
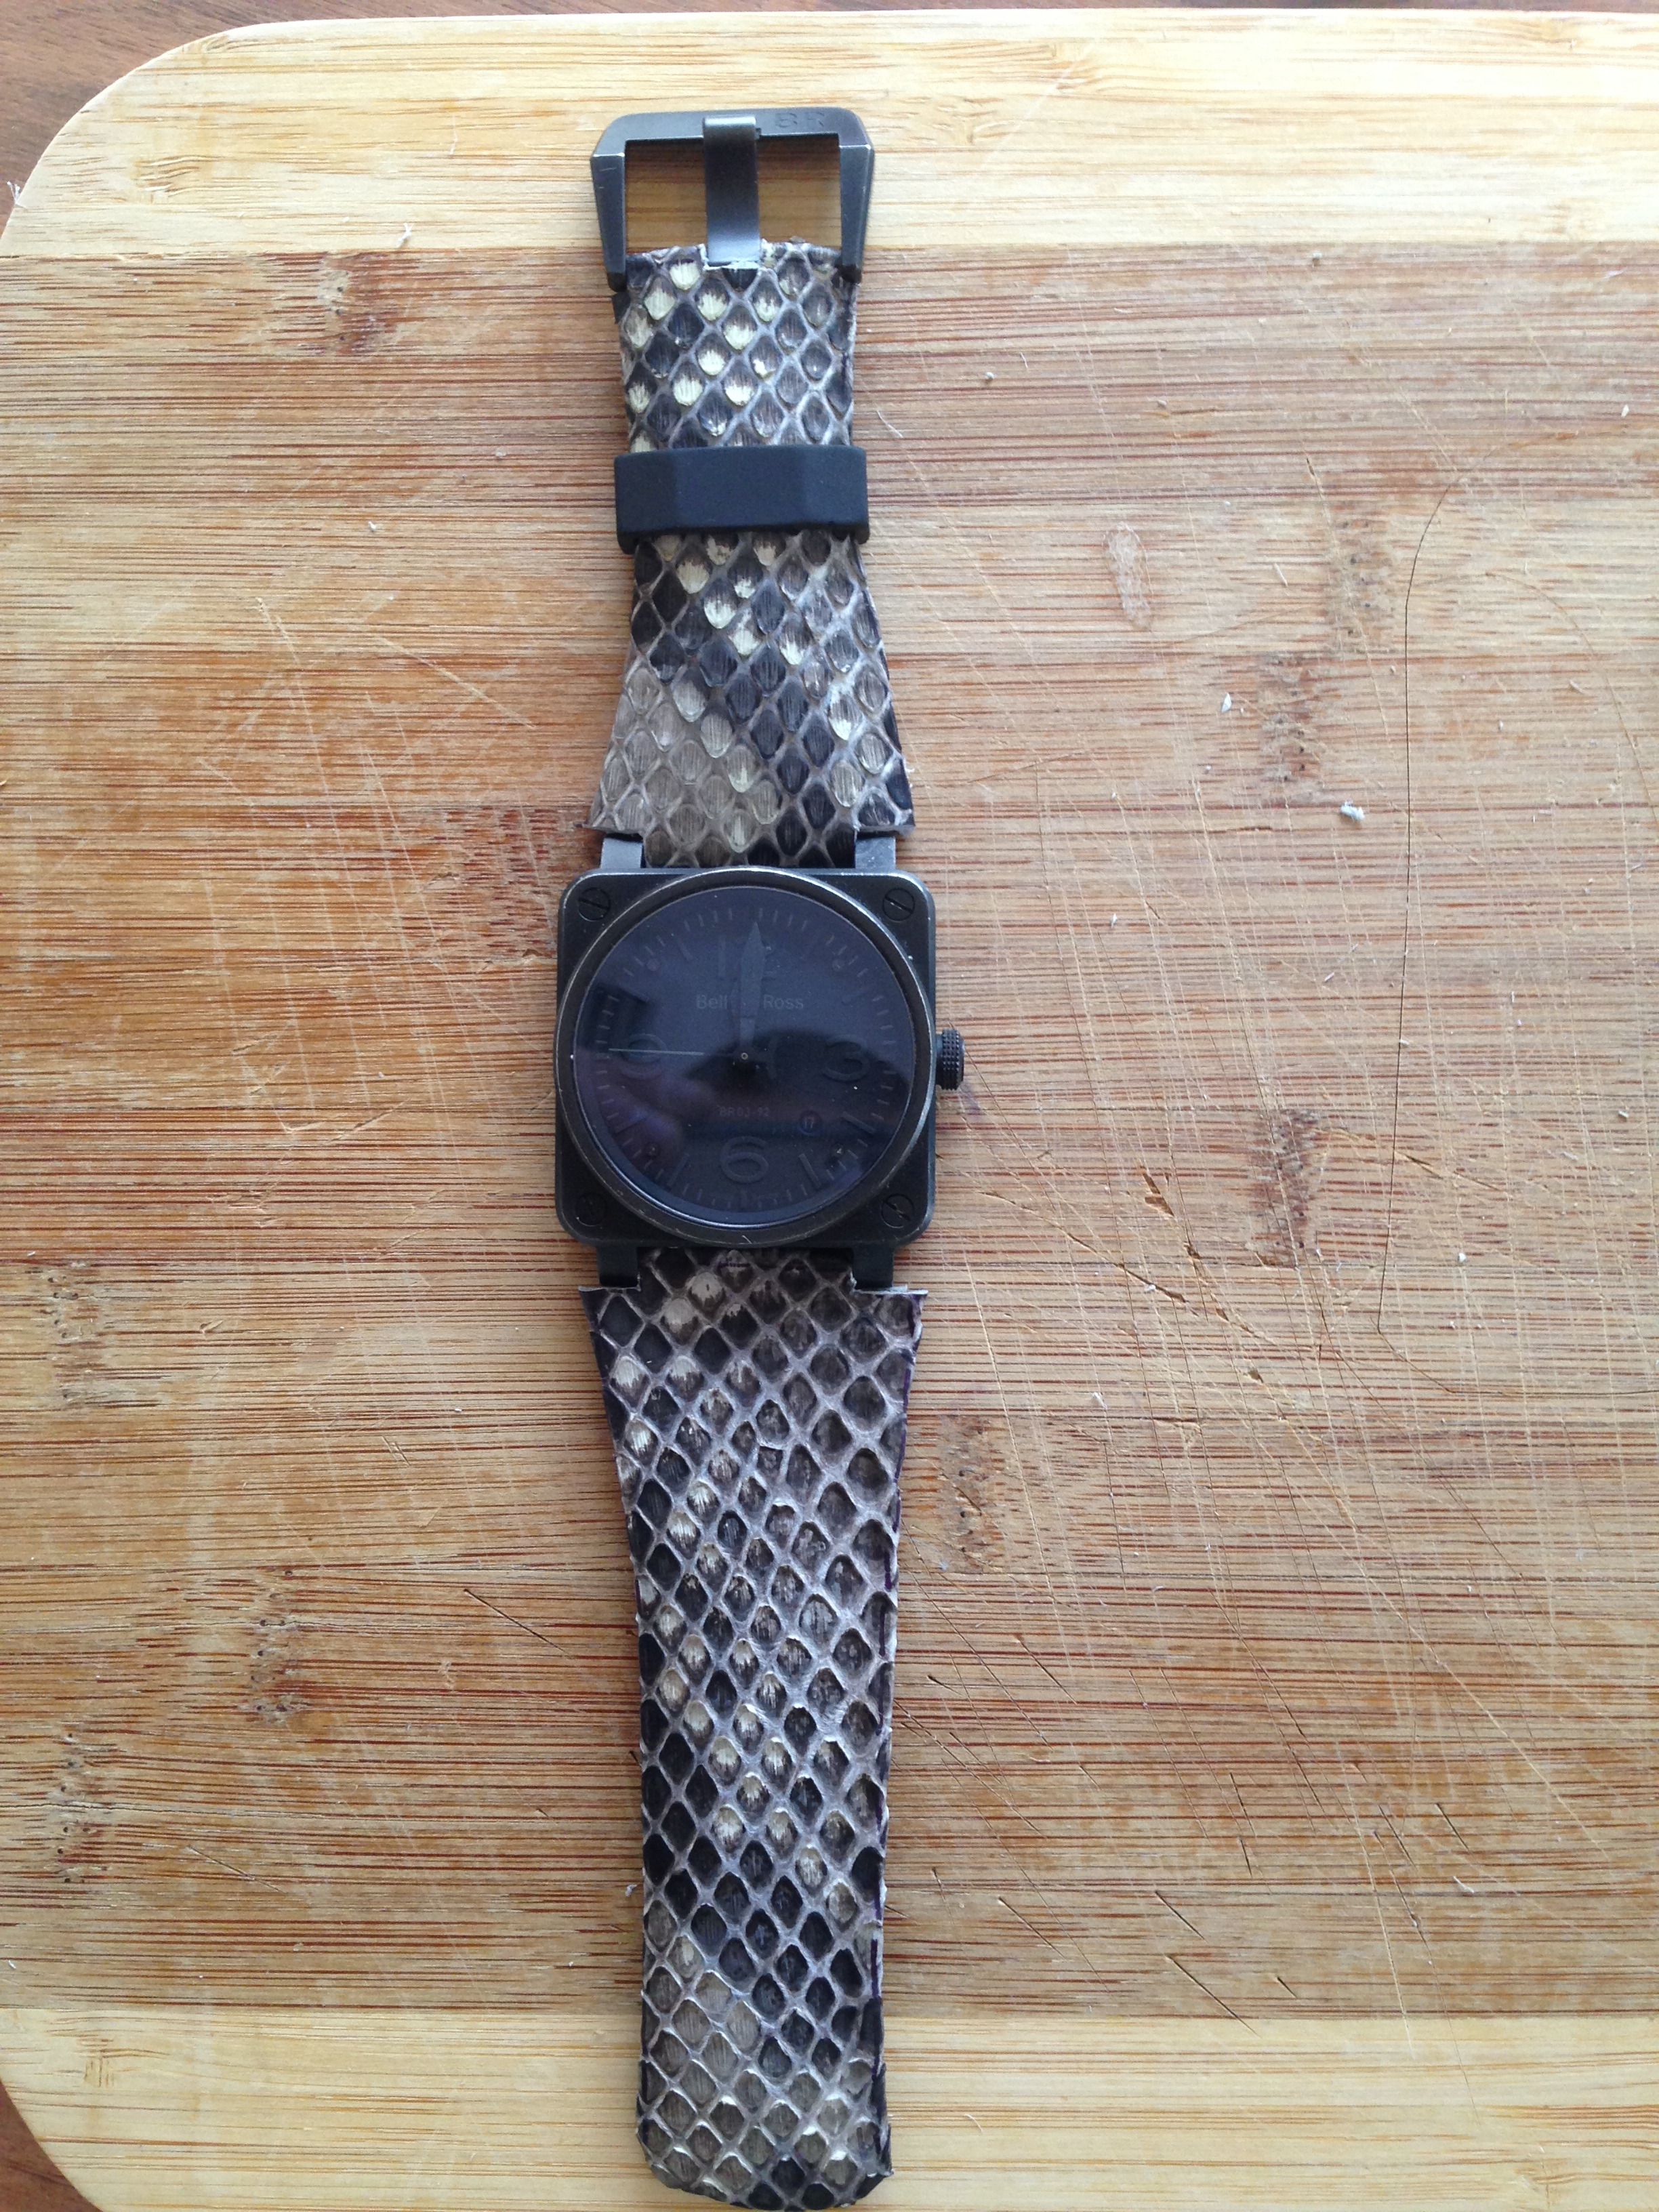
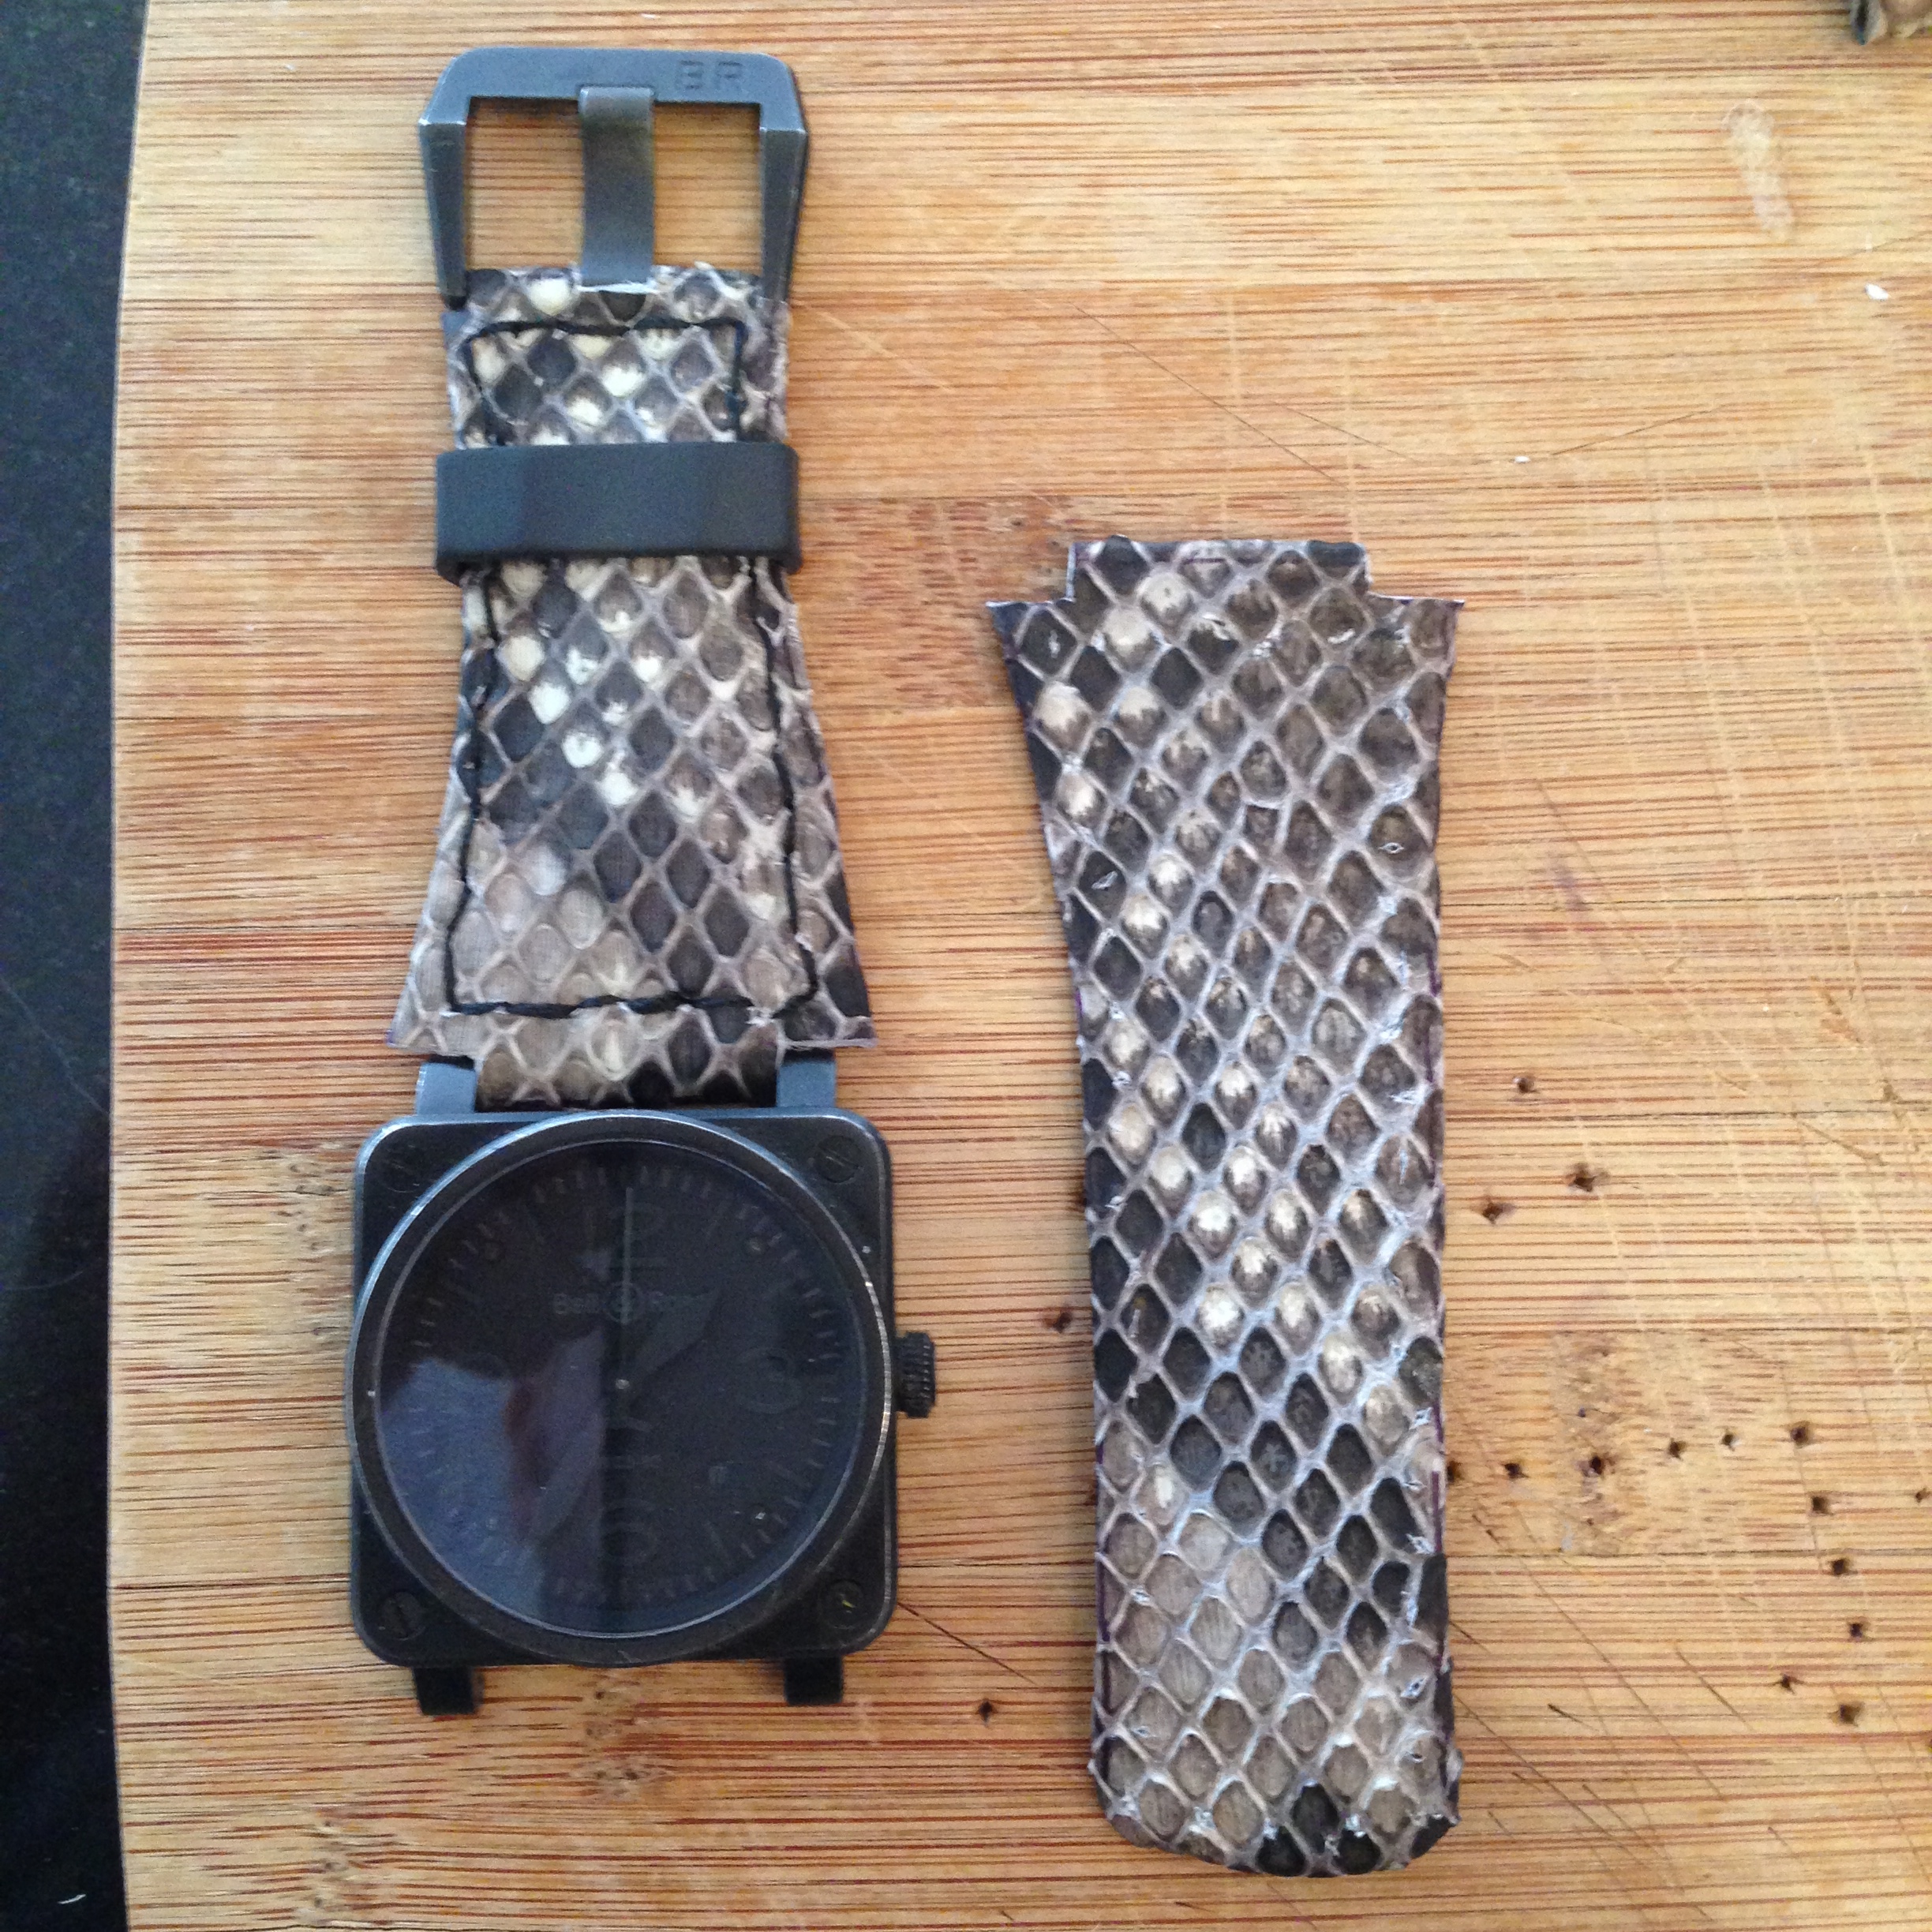
I’ve always been a huge fan of skins from things like snakes and crocodiles, and any other types of leather with a bit of character. I’m also a big fan of nice watches, so naturally I’m drawn to the idea of snakeskin watchbands. A few years back I got myself a Bell & Ross Phantom watch and went looking for a nice snakeskin band for it. Not happy with anything I could find, I set about making my own using a python skin that I came by during my travels. My first attempt was a bit of a rough prototype, but ended up working nicely, so I used it for a couple of years. When it started to get a little worn, I decided to try and make a new and improved one from the same skin. The photos below show the watch with the old band that I made, as well as the original band being used as a template to cut the new snake skin.


It was important to cut a template that would allow me to double the skin over at the back in order to give the band more strength, but more importantly to be able to stitch in the pins and buckles that hold the band to the watch for security. It would be a terrible shame to have the whole thing fall apart at an inopportune moment (like fat-arming out of a car) on account of poor workmanship. By folding the skin along the lines of the template and then ironing the skin flat, the two parts of the band start to take shape.


I chose to hand stitch this band, as I don’t have a sewing machine that will punch through leather, so the next step was to pre-punch some holes along where I planned to stitch at 5mm intervals.
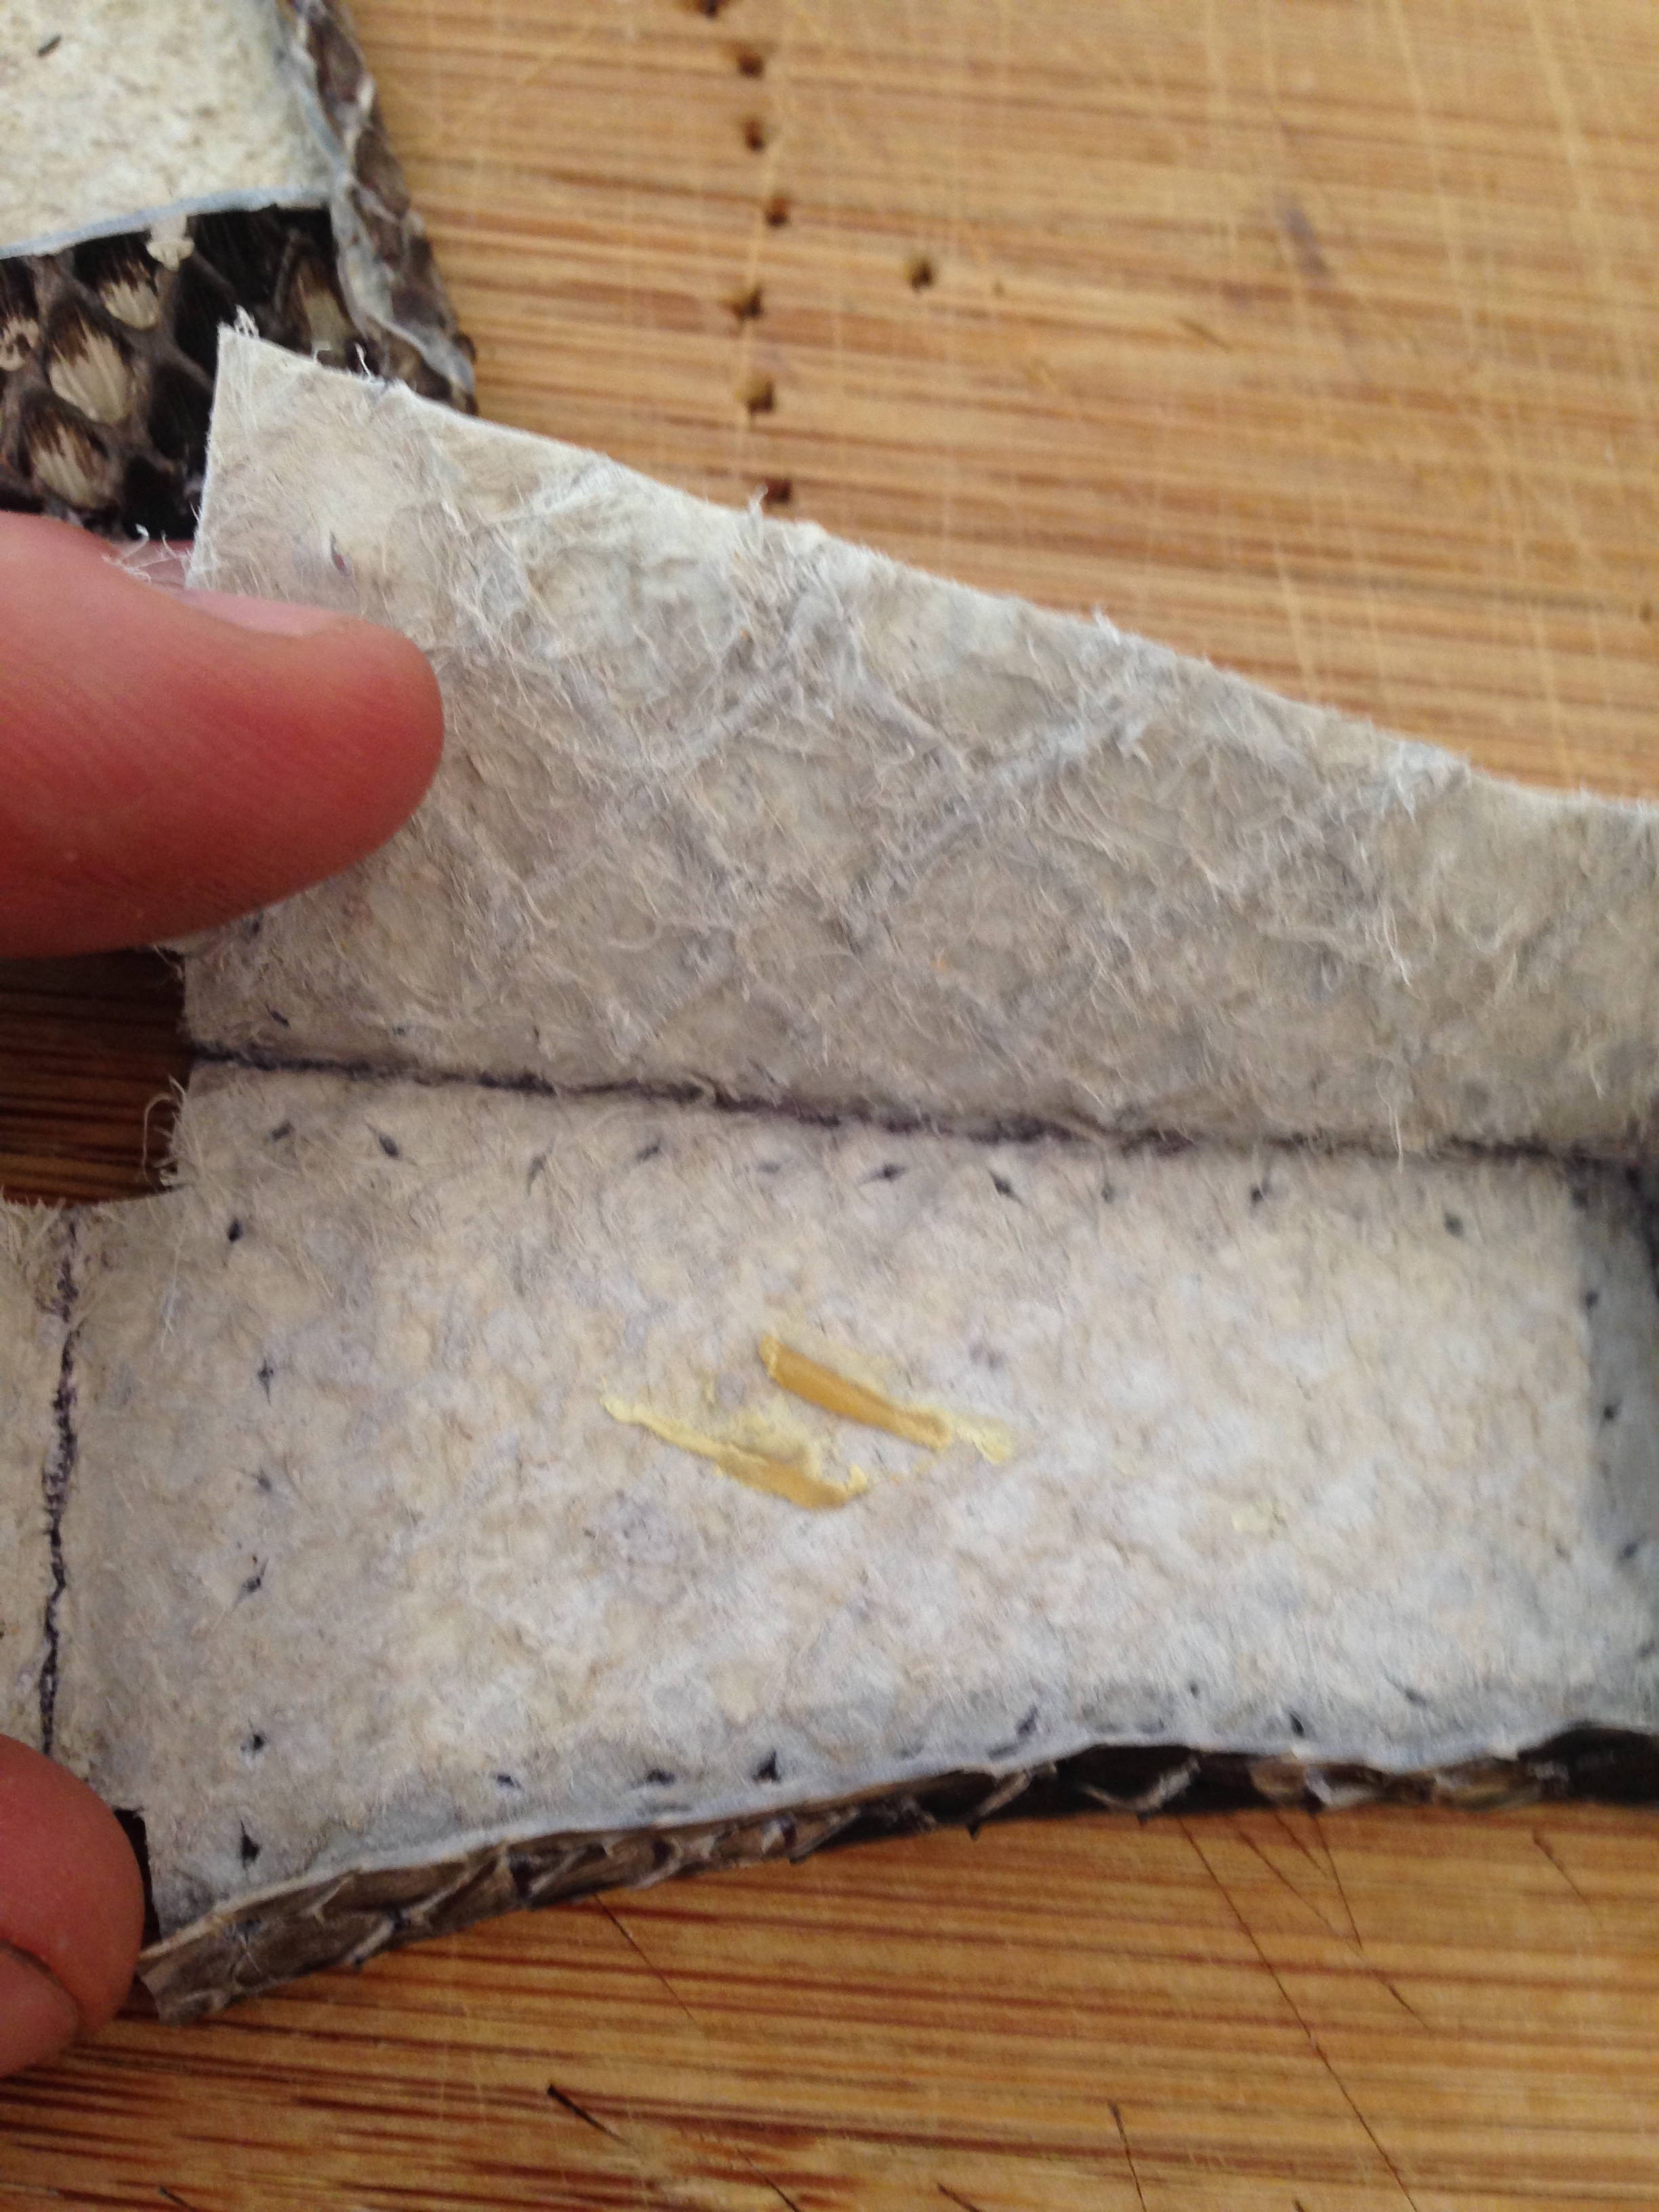
From there, the snake skin pieces were glued together with contact adhesive making sure to leave a small area at the watch end of both pieces unglued, as this is where the pin will need to go through to attach the band to the watch. I’ve inserted a wooden skewer into the hole for the watch pin to ensure it doesn’t stick together. The same consideration needs to be made for where the buckle will attach to the watch strap.


A test fit of the band was then done, and the small notches required were cut from the ends of the band to fit it snugly against the watch and the buckle. I’ve purposely made the band a very tight fit as I found my previous one shrunk a little over time.


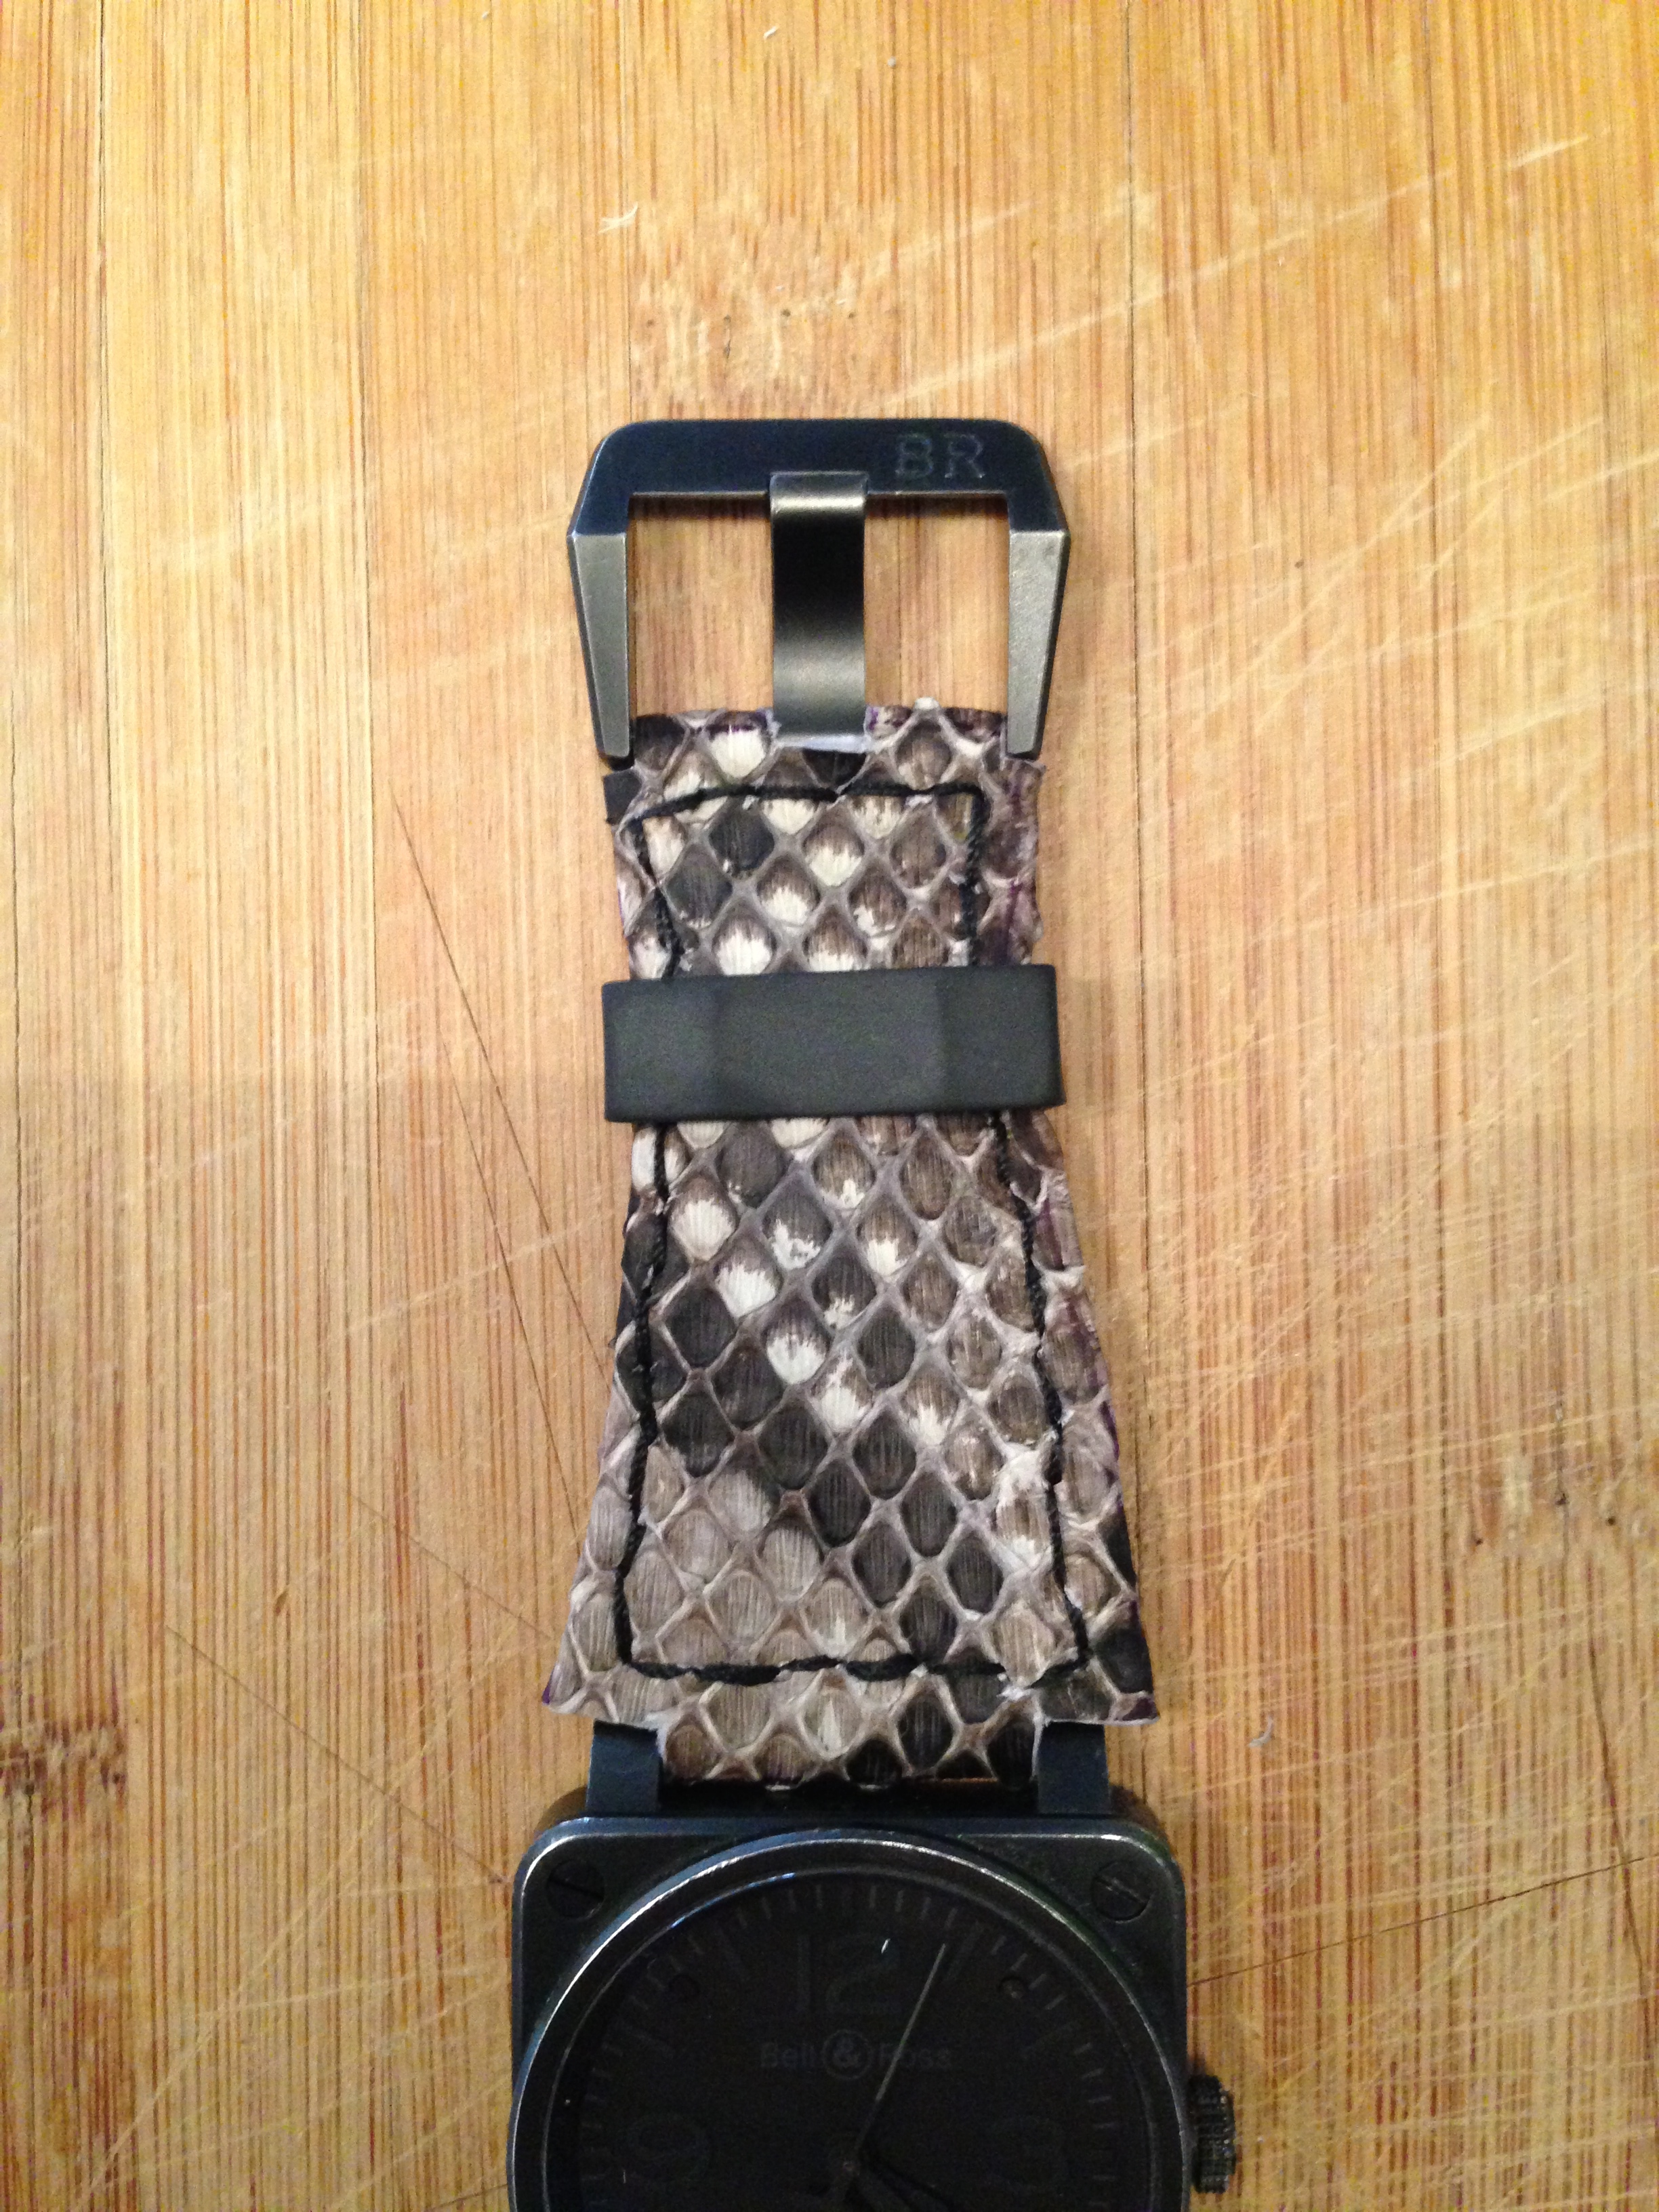
Once happy with the fit, the band was double stitched through the pre-punched holes. Naturally a sewing machine could be used for this phase if a more professional look was desired. I’m a big fan of the imperfect hand-stitched look myself.

Once the stitching around the outside was completed, the only thing left to do was to punch a hole in the band for the buckle to go through. As this is a custom band, I only needed to punch a single hole to suit my wrist. I then stitched around the hole in order to minimise the chance of it stretching under the tension of the watch being worn. That was an issue I had with the previous strap, which caused it to come loose over time.


The finished product! All in all it took about 2 hours to make, and as I already had the snake skin, cost me very little in materials, just a few bucks worth of contact adhesive and thread. If you hunt around a bit on the internet, you can pick up some quality snake skins at pretty reasonable prices, but be sure to check any import restrictions if you’re trying to get them in from overseas. Thanks for looking. Cheers, dan.

This looks absolutely wonderful! I’m looking forward to trying this with a 1’8″ copperhead I just skinned. I was wondering though if you think that would be enough skin? My watchbands aren’t as big as you’re picture but I’m still concerned because it’s not that big of a snake. Any feedback would be greatly appreciated!